Showing posts with label Terrain. Show all posts

Thursday, August 6, 2020

Grot Walker Pt. 6

Last night, while my spouse sought inner peace and tranquility through guided human pretzel-fication/chakra alignment, I sought inner peace by working on death and destruction in the 41st millennium. 

I began by planning where the walkers legs were going to be positioned and then I started gluing bits of cork to the base with Modge-Podge.

After the initial application I added more of the goop, and then 1 single square of TP. Using a damp paint brush I gently worked the TP into the base, added another layer of goop, then repeated the whole process. 

After cleaning up the edges I let the base dry overnight. The next morning this was the result. 

Pretty impressive, right? I was quite pleased with my discovery, until I realized that I was and old man playing with what amounts to papier mache. Not much of a discovery...

Sometimes it's the journey that matters, while other times it's the destination. This is a fine example of the latter; a natural looking randomly uneven surface upon which more materials can be applied. 

HMP

Sunday, July 12, 2020

"Strategic Objective"

A pile of crap glued onto the lid of a spice jar, or the "Comm. Sat. Relay Strategic Objective"? The truth probably lies somewhere in between those extremes. 


I really wanted to try out the green stuff and see how hard it is to work with while it is soft, and I also wanted to find out how tough it is to shape, be it shave, sand, scape, etc. once it's dry. To do this I constructed this beauty from some bits of wire, a pen, a hunk of sprue, and whatever else was lying around my junk box. Then I tried to add some "blocks" of green stuff.


My experiences so far are as follows. The initial sculpting is/was pretty good.  The material starts out quite tacky, but working with a bit of grease makes things pretty easy.  


Does the kind of grease matter? I dunno, I used good old nose grease, which is convenient, because it's always between your eyes and the work... As I've found with other projects of this type, organic things seem easier to sculpt than metal bits. Mostly because the former are typically devoid of 90 degree angles and perfectly flat surfaces... by trying to add square blocks this was as hard a first test as possible (idiot). Once the resin hardens and I have a go at the post sculpting, sculpting, as it were, I'll update again.


HMP

Sunday, October 6, 2019

The Ground Beneath Their Feet

Well, I'm still basing. I hope to actually add little green men to them this week.

Left showing plaster chips, sand, grounds, right shows after Zandri Dust
Nothing new here. I used super glue to attach the large rocks to the base. This way when you add the smaller debris it looks like the bigger rocks are actually buried, otherwise you end up with boulders sitting on top of a field. There's nothing wrong with that, it's just a different look. I added the grit and smaller stuff by running tape around the base and then flooding the bottom with Titebond II Premium Wood Glue, then pouring on the grit stuff (coffee grounds). Once everything had dried I removed the tape and sprayed everything down with isopropyl alcohol (IPA) before washing with 1:1 glue water mixture, to seal the surface. The IPA just helps break the surface tension and makes everything wet better. The finer sand was applied using super glue and covering it with sand.

After washing, dry brushing, and grass!

For painting I based everything with Zandri Dust and then washed with Reikland Fleshshade for the big rocks and Agrax Earthshade for the smaller grit. Added some Nuln Oil here and there. Then dry brushed with mixtures of Ushabti Bone + Zandri Dust, re-washed the big rocks where they got too light, and then added the grass.

That's all that's new.

Tuesday, July 30, 2019

Working on Basing

Basing isn't one of my strong points, and often it shows. Here's my latest crack at it.

The subject

Very thinly sliced cork

White Glue!

More white glue!

Sand

After cork/sand
After cork/sand/plaster chips 

Cork/sand/plaster chips/Zandri Dust/Ushabti Bone/Fleshshade/Agrax/Ushabti bone


Right, there's no magic here... Very thinly sliced cork covers the big hole in the middle and adds some height. Once dried, covering the cork with glue and then sand gives the most ghetto of finishes (attention table-top). I let this dry completely before saturating with more glue and shaking it in my bag of plaster bits. Plaster bits are nice and sharp and you can easily remove all the fines by screening it. Depending on how much time you spend with the hammer the plaster can vary in size. Now the plaster tends to drink paints so it's worthwhile to seal the whole deal with a 1:1 white glue:water mixture. Let that dry.

Come back a day layer and paint it up. I find for Martian surfaces a random mix of Reikland Fleshshade and Agrax Earthshade breaks things up nicely. I would say that at this stage we gave reached the level of table-top+. I just made that up, and I'm going to tag it.

DMGWLFP


Saturday, March 2, 2019

Grassy Swamp

Ok. The new reeds are shorter, pre-painted, and blended before gluing.  I think they might be a bit tall still, but we're getting closer. I also made an "aquarium" (containment device) around the non-practice base.

Wednesday, February 27, 2019

Swamps, Grasses, and Reeds


As you are aware I'm working on a base for the Dragon Lizard. Being the cautious careful type I decided to try out my reeds on a test base before messing up the "good" one. 
Swamp reeds (attempt 1)

That was a good idea. Look at that mess. They're too tall, too yellow, and too just "not good enough". So I started throwing some paint around, mostly Dryad Bark, Loren Forest, and Moot Green, and slowly things started to look a bit more organic. Then the OCD hit, and now we're painting grass...
Painting grass
Other problems that have come to my attention: how I'm going to get square corners on the resin pour!

Wednesday, August 22, 2018

Age of Sigmar, Sigmarite Mausoleum

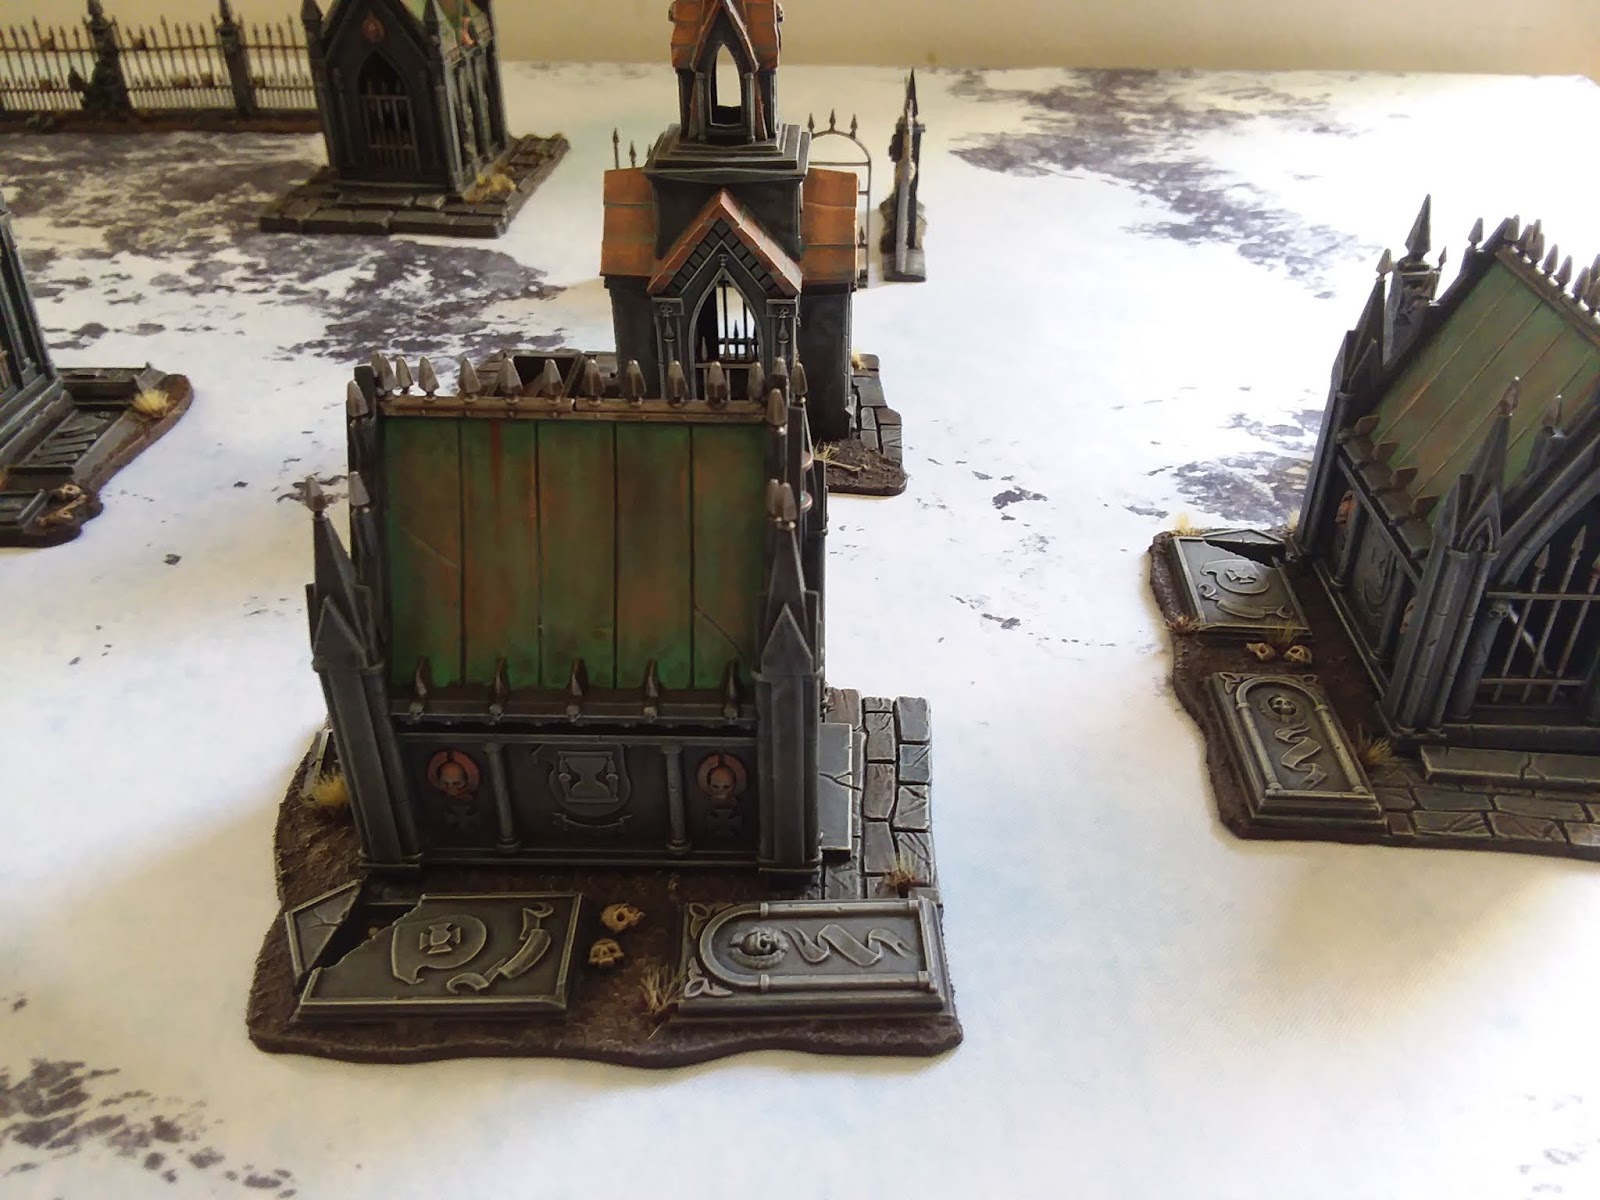
It's official (well no, not really), but the Age of Sigmar, Sigmarite Mausoleum, is pretty sweet terrain for Frostgrave. The evidence I have is as follows:
Exhibit A (for Awesome)


Take note of the sweet looking patina on the roof.
Exhibit B (for Badass)
Note the overall composition.
Exhibit C (for Crazy paint job)
I'd love to take credit for this work, but sadly I can't. What I can tell you is that the Sigmar stuff made for a pretty sweet game of Frostgrave. Also, if you're looking for a sweet copper roof aged to perfection I can let you in on a little secret; Games Workshop Screaming Bell. You can have your own sweet looking copper roof in a flash.

DMGWLFP


Sunday, July 8, 2018

Dirt!

In this post I'm going to show how I do some dirt effects. 

Starting with our stone base carefully paint some medium where you want the dirt. Then I'm going to use compressed chalk pastel and the edge of a hobby knife to scrape the chalk.
The pastels were designed for skin tones but it results in a lot of good browns. Specifically: Burnt Umber, Van Dyke Brown, Sepia (green hue), and others. You can pre-shave to make a mixture of the colors you want, or start with just one and see. 
Keep going and then tap off the excess and save it for later (I used Al foil)
There you have it, this is the result of Burnt Umber and Van Dyke brown.
Use tiny amounts of grass if you like.
Here's the critters.

Monday, June 25, 2018

More Plaster Basing

The Scibor Snail people are coming along. So it's time to work on their bases. I'm trying out some cobblestone/brick work.
I think the trick is to be careful, but not too careful. I want a more organic look that's not overly regular, because cobble isn't perfect. 
The various levels of free form are obvious here. Top left is rectangular brick, where the main vertical lines were scribed first, then the horizontal cuts were added with care. Top right is similar to the top left, but here individual bricks were cut with less care. Bottom left was generated completely free hand, the look is very organic.

Since all the snails are a going together they need to have matching bricks. Given their gnarly nature, im going to go fully free hand. Im going to mount these cunks for other pieces. 
I went for a large cobble look here.  By using a single sheet the models should tie together  well. 
The whole family!

Remember, DMGWLFP.

Friday, May 25, 2018

Basing With Plaster

In a continuation of my last post... I made a round plaster base with foil and a container. After it set up I removed the mould and trimmed off the excess plaster. It doesn't need to be perfect right now, because we'll finish with a second cast to clean up the edges and make them sharp (right now it's got a bit of curvature). Be sure to save the off cuts as they make great rocks.
Grots live in caves (I think) so most of the ground should be rocks and gravel. I'm going to simulate this using old coffee grounds. Trader Joe's French Vanilla to be exact.  
After taking off the excess, priming with gray, and the first wash.

Here's a quick shot of the type of thing I'm going for. basically a bunch of random stuff all going on at once. Grot's aren't known for being big planners, and once the magic mushroom stew hits....
DMGWLFP... 

Saturday, May 19, 2018

The Base of Basing

Soooo. Working on some basing. I trying out using plaster of Paris and Al foil, so far the tests are promising.
I started by crumpling some foil and flattening it out then pushing it into a dish.  The harder you crumple it at first the more texture in the end.
My first attempt was the size of a normal base. It looks tall, but you want to leave excess that you can cut/sand off later.
The second was a little more ambitious, but it wasn't deep enough and cracked while trying to remove the mold. I'm planning on just pouring more on top. 
For the third mold I crinkled the foil a lot more. We'll see how it comes out.
Straight out of the molds.  It is very easy to sand and shape with a hobby knife. 

I'm not actually sure how i feel about the results, but I'm going to keep pressing forward.
Figure only to illustrate point...